I love how your corridor-like layout allows for such well-placed workstations. And I love that everything I need is within reach of only 2-5 small paces.
You, Mr. Kitchen, are the superior space to those huge, sprawling McMansion kitchens. Those Real Housewives have to take 37 steps to get from the fridge to the sink, plus an extra 14 steps over to the cabinet where the colander is stored, just to wash some darned spinach. But not you, Mr. Galley Kitchen.
The layout of your cabinetry and appliances are more ergonomically-sound than your counterparts, which inevitably lends to better organization and storage.
I've been caught up in the Season of Christmas, hence my absence from the blog. Between nursing a three-and-a-half-week-long head cold (three and a half weeks, people!) and managing the shopping/wrapping/sending gift mission and, oh yeah, work, I've neglected CYAH for over a week. Shame on me.
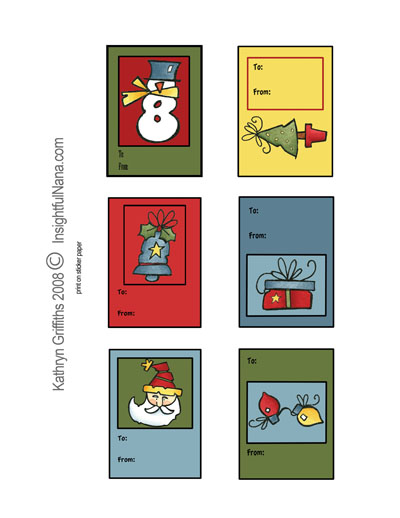
But I come back bearing gifts... FREE printable gift tags for your holiday gifts. There are many artistic, crafty and downright adorable bloggers & artists on the web who have generously provided their art for free download this season. So why buy those tiny sticker tags or pricey cardstock options when you can print them out for free on your own paper at home? Any of these will add an extra crafty panache to your gifts this year.
After tackling this overflowing Home Office re-organization project earlier this year, I realized that organization is an imperative element to design. What's the use of a highly designed home if it's not an efficient space for living life?
In all my projects, I strive to create elegant spaces for my clients that are comfortable and efficient. But how can one create efficiency when clutter seems to take over?
Clutter is normal. Life happens. If you saw my kitchen table at any given moment, you'd see that I fall victim to the clutter beast, just like everyone else. But, the challenge (i.e. the secret) is to create an infrastructure to move the clutter through your home and into designated paths. Circulation is key, here. Clutter can't come into the home and stop moving. Whether you file it, shred it, or recycle it, the point is that your paperwork clutter has a final destination in your home.
This particular room was a huge stress for my very dear client, who shares this office with her young daughter. They each have a desk, and matching chairs on wheels for zooming over to each others' workstations to help on homework or view a fun youtube together. But, the clutter took over in this room, engulfing the pathway between their desks. Piles of unsorted mail, dated catalogs, old post-it notes and rejected school supplies piled up on every surface, including the floor.
BEFORE: Piled up paperwork on desks and the floors made this space difficult to navigate
AFTER: Cleared surfaces show a lovely, spacious room, perfectly suited for bill paying, homework and reading.
I had been working with this client for months by the time she was ready to tackle this space together. It seemed insurmountable, but we pumped ourselves up and started with a simple plan:
Start with 1 pile, and go through every document in the pile.
Each piece of the pile goes into one of 3 bins: FILE, SHRED or DONATE.
Yep, donate. There were a number of unused or duplicate school supplies and office supplies in this office that we decided to donate to a needy cause in her neighborhood. You'd be surprised how many unneccessary/surplus binders you find in your piles once you start piecing out each item.
Finish the pile. Smile. Have a sip of tea.
Repeat the process on a new pile.
It sounds like I'm being sarcastic, but I'm not. The only way we could stay optimistic about this massive clear-out was to pretend that it wasn't all that massive at all.
BEFORE: It was overwhelming at first, but we took it pile-by-pile to get through it.
AFTER: The pile-by-pile method broke up the colossal pressure of the project.
The office serves the entire household, and as such there are many different pieces of equipment needed in the room. Try as I might to clear out the whole place, it's a working office with many demands, so the big laser printer needed to stay, as did an inkjet priner and a separate high-performance fax machine (the latter of the 2 live in that fantastic bookstand at the window that faces their pretty street).
BEFORE: Without a system in place, this bookcase was under-utilized
The tall bookcase had been a dumping ground for packaged paper products, phone directories and reference books. I decided to completely empty the entire case before refilling it with sorted goods. Doing so gave us a chance to wipe down all the shelves and grab those teeny dust bunies that gather in the back corners. It also gave us a blank canvas to which I assigned 'jobs' to each shelf. For example, I assigned the middle shelf to house the spiral-bound directories because they are used most often, because the middle shelf was the most comfortable reaching distance for my client in her seated rolling chair. Each shelf was given a purpose, a job. And seeing each surface as a dedicated space for only a pre-assigned category can mentally steer you a way from dumping random clutter onto the surface in the future.
AFTER: Previously, this bookshelf was under-utilized until we assigned each shelf a 'job.'
We purchased clear side-loading plastic trays for all the various printer papers and stationery goods. I used my trusty label maker to affix to each tray. Clear labeling of assigned duties for your organization accessories helps keep the infrastructure in place down the road. Also, I think the space looks cleaner when the packaging on the reams of paper were removed. They're rather unsightly with sagging sides & torn edges.
BEFORE: Looking out to the hallway through a series of messy obstacles
AFTER: Clear, clean and cool.
I was the motivator and foreman on this project but, in the end, this was her life and her office so she did much of the hard work. Were it a kitchen organization or a mudroom, I could have handled the project alone. But with something like a home office, the homeowner has to lead the way. She wanted to keep old financial documents and homework that her kids had done years prior, things that I might have considered shredding. She needed to sort through the paperwork that backs up her life, not me.
I am incredibly proud of her enthusiasm and dedication to the challenge. She and I worked two 14-hour days, back to back, but we "moved mountains," as she said. I've visited her home since we did this job, and I'm delighted to report it's just as tidy & neat as the night we finished. The system really changed her method of dealing with paper clutter. I felt that I gave her the room back.
To me, interior design isn't just about making pretty rooms. It's about creating functional spaces. Function can only come from efficiency, and efficiency is mastered with good infrastructure. Organizing is just as valuable as designing, and I'm proud of my results in both sectors.
This architect DEFINES minimal living. I applaud his dedication to a tidy, organized and well-edited home. His resourcefulness and handy construction work are commendable. He says he loves the Midtown location of this closet home. He's willing to live with very little privacy and comfort in the name of efficiency. But is his willingness worth it?
It's no lie that Manhattan apartments are typically overpriced, but I find this to be a disgusting example of thievery in urban real estate. Just look at the work he had to do to make this place livable.
When I first moved to NYC in 2002, I lived in a basement studio apartment on the Upper Westside. It was small and perfect for a single girl with little money and few belongings. I was paying 60% more than this fella pays with 449% more space. I had my own bathroom. I had counter space in a tiny kitchen. There was a stove. I had room for a full-size bed AND a chair. I lived 30 blocks north of where this guy lives. The fact that he's paying so much to live in a space so little seems inflated even to me, a jaded Manhattanite.
What do you think? Is the desire to live in a prime location worth sacrificing one's sense of personal space & comfort?
I am often asked if I judge others' homes immediately upon entering. "Of course not," I balk. "Does an optometrist judge every set of eyeballs he meets? Nope. Only the ones who are paying him to do so." Comparing myself to an Optometrist is absurd, and I know it.
That being said, there is ONE thing that I notice [no matter how much I try not to] when I'm in any place. This one thing is a personal pet peeve, and one of the few Design Sins.*
*A word about sins: There are only a handful major 'sins' in design. These usually have to do with space planning and safety code adherence. In decorating, however, there are a few more sins and they're frequently changing with trends, fashion, etc. To that end, I'm not one for WRONG vs. RIGHT. A little decorating sin is not the end of the world and no one deserves a big red X slashed across a snapshot of their home. So, I choose to work with the phraseology of "Unfortunate" vs. "Better." An unfortunate decision about home decor is subjective and I am not one to throw invisible Rule Books at anyone.
As I was saying, of all the "unfortunate" sins, there is only 1 that will send me into a mental tizzy when I cast my eyes upon it. Even if I'm a guest in your home and I'm not hired to be judging the home, I can't help myself with this one issue.
This sin is.... Your wall art. You hang it too high. And you often hang it poorly so it's CROOKED. I've been caught more than once leveling our a frame while standing near a wall during a cocktail party. OCD much? You betcha.
The TOO HIGH ART PLACEMENT is not something that I can sneakily fix while enjoying your cocktail party, tho. It's a problem that can be avoided/fixed, though, with a few simple rules and very handy tools.
Your art is begging you to stop hanging it too high! Purple shirt is making an 'unfortunate' mistake!
The confusing suggestion for many people is that "you should hang your art at Eye Level." Whose eye level, though? For example, I'm a shorty and my eye level is much lower than my tall husband. The standard blanket-statement guideline is to hang your art at 57" on center from the floor. Keep reading for more on this...
A 'Rules of Thumb' page with hanging level diagram that I included with a an e-decorating presentation.
In the museum and gallery industry, pieces are hung at this 57" line (though I've spoken with a few people who claim its 56"). So if the world's finest art is being hung at an 'eye level' of 57", isn't it fair to say that this standard is something by which we should/could all abide?
There are plenty of online sources to explain the best/better/'only' way to hang your art (try here, here and here though that last one is a little contrived and complicated in its rules-yness so pls take it with a grain of salt). But when I saw the handy-dandy photoshopping skills of fellow blogger Mojan below, I saved the post and her clever comparison photos because it was a very simple and straight-forward visual presentation of the too-high conundrum.
UNFORTUNATE: If this looks perfectly fine to you, please keep reading.
Wall-hung artwork should relate to what's happening in the room. In the room above, a beautiful New Orleans home, the art is floating in a sea of pale wall. The painting seems to be hovering over the room, not accompanying the furniture and decor. The placement is, in fact, doing a huge injustice to this stunning painting, and to the entire room.
BETTER: This is the original image from Lonny that Mojan tweaked above, See how the painting's placement is closer to the sofa, creating a stronger sense of composition and balance? In fact, the room seems larger and airier with the proper art placement.
Use the 57" line to dictate the center of a gallery-style grouping.
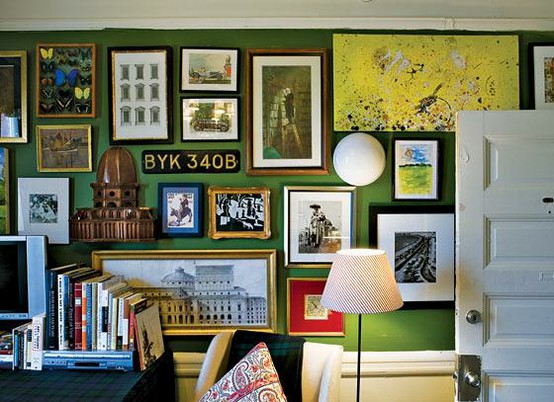
And while we're on the subject of gallery-style groupings, use your walls to their best potential by filling them a wide range of art. Combine fine heirlooms pieces with thrift finds and framed projects that your kids drew in school. Mix pen&ink drawings with huge photographs. Or oil paintings with vintage postcards. The mis-matchyness of a diverse art wall is what makes the gallery-style installation work so well.
I use a very handy little tool called the Hang & Level* when hanging art. I find my 57" line, tape up a little Frog Tape to mark it, and go from there. The Hang & Level helps me make the right marks on the wall before we start impulsively banging holes into walls. And having the multi-level guides helps to avoid an off-center or crooked installation. Crooked art is off-putting, and can be so easily resolved. Pop a level on your frame and watch the bubble guide you to a straight line. Easy peasy!
My best pal on quickie installations
*Not an endorsement for the Hang & Level tool.
So what did we learn today? That the 'unfortunate' mistakes of decorating are not deadly sins, but easy adjustments for a more refined appearance in your home. Now, unfortunate mistakes of design are a bigger problem, with steeper consequences. Perhaps I'll do a post on design sins soon!